The aim of this blog post is not explaining how NFC works but giving some advice to setup a lab and start playing with this technology.
NFC technology interaction technique is seen as touch based interaction. User first interacts with a smart object (either an NFC tag, NFC reader, or another NFC enabled mobile phone) using her mobile phone. After the touching occurs, mobile device may make use of received data and thus may additionally use mobile services as well, such as opening a web page, making a web service connection etc.

Figure 1. NFC technology interaction technique.
A connection between the NFC controller and the SE.

Figure 2. NFC controller connections with SE.
Card Emulation with a Secure Element
When NFC card emulation is provided using a secure element, the card to be emulated is provisioned into the secure element on the device through an Android application. Then, when the user holds the device over an NFC terminal, the NFC controller in the device routes all data from the reader directly to the secure element. Figure 1 illustrates this concept.

Figure 3. NFC card emulation with a secure element.
Host-based Card Emulation
When an NFC card is emulated using host-based card emulation, the data is routed to the host CPU on which Android applications are running directly, instead of routing the NFC protocol frames to a secure element. Figure 2 illustrates how host-based card emulation works.

Figure 4. NFC card emulation without a secure element
The first thing we need is a NFC reader/writer. After looking around the most used are the following:
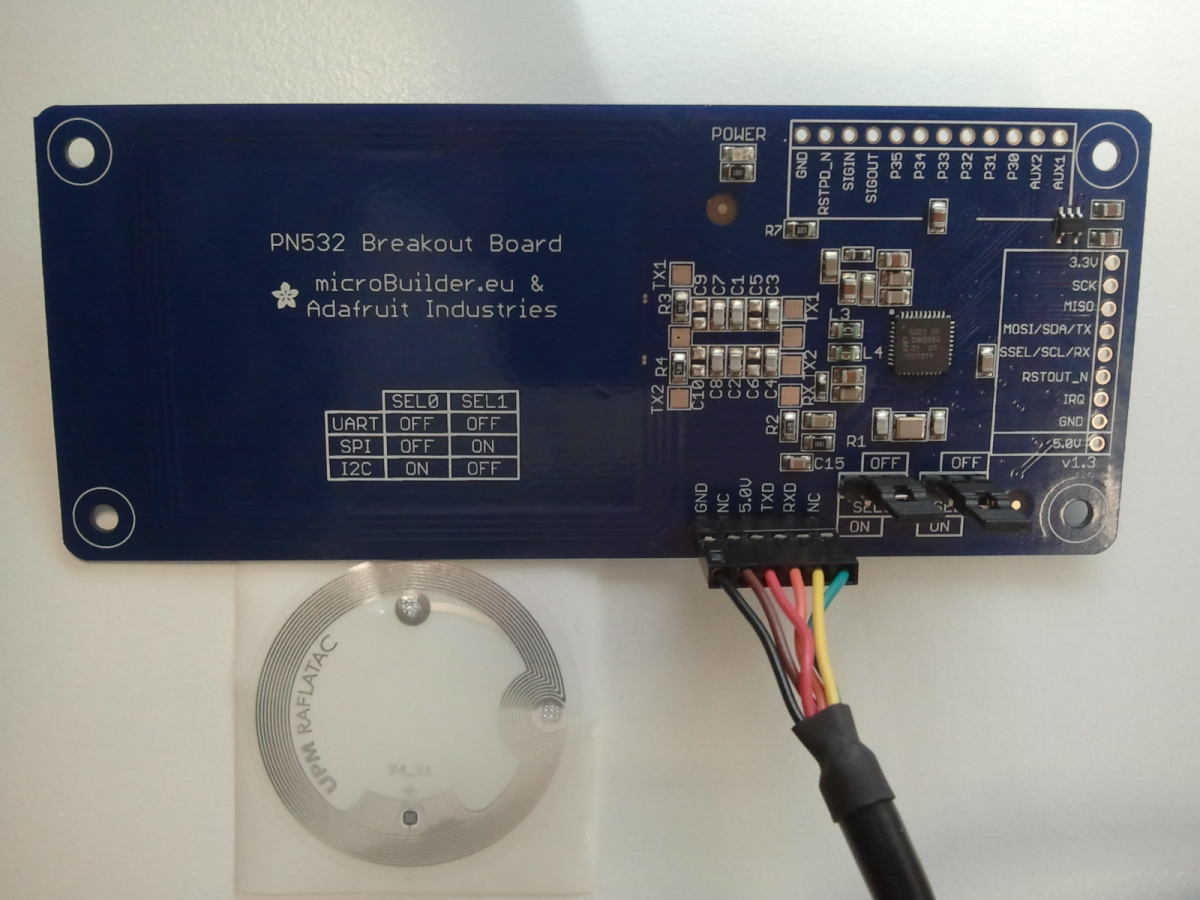
PN532 NFC/RFID CONTROLLER BREAKOUT BOARD


more details : https://www.adafruit.com/products/364
nfcpy
A Python module to read/write NFC tags or communicate with another NFC device.
The nfcpy project is hosted on https://github.com/nfcpy. This Launchpad project site is mainly kept active for the Answers section. The code section mirrors the GitHub repository.
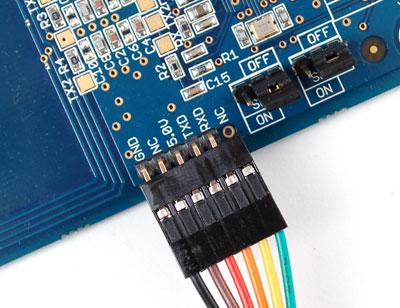
I’m going to focus on the NFC board I’ve mentioned (PN532). When it’s received at home it’s not ready to work. Some pins must be soldered to be able to choose between the different communication interfaces (UART, SPI or I2C). If you use a
FTDI cable other 5 pins must be also soldered to have something to connect in the board (the 5 left pins in the image below). There are
some web sites very helpful to perform these steps and you can always
ask questions in the Adafruit forum.

Now we have the hardware ready, it’s time to install the proper software. The most mature project talking about developing NFC tools seems to be
libnfc, created in early 2009. If you prefer using Python you can find
pynfc and
nfcpy, being the latter the most active and recommendable out of the two. We can find a lot of information about installing
libnfc in the official web page, but also in
other sites and forums. Focusing on Ubuntu the steps we can take to install it are the following (some package versions and names can be different depending on distributions, tested with Ubuntu 10.04):
$ sudo apt-get install libusb-dev libpcsclite-dev
$ sudo apt-get install libusb-0.1-4 libpcsclite1 libccid pcscd libftdi1
$ wget http://libnfc.googlecode.com/files/libnfc-x.x.x.tar.gz
$ tar -xvzf libnfc-x.x.x.tar.gz
$ cd libnfc-x.x.x
$ ./configure --with-drivers=pn532_uart --enable-serial-autoprobe
$ make clean
$ make
$ make install
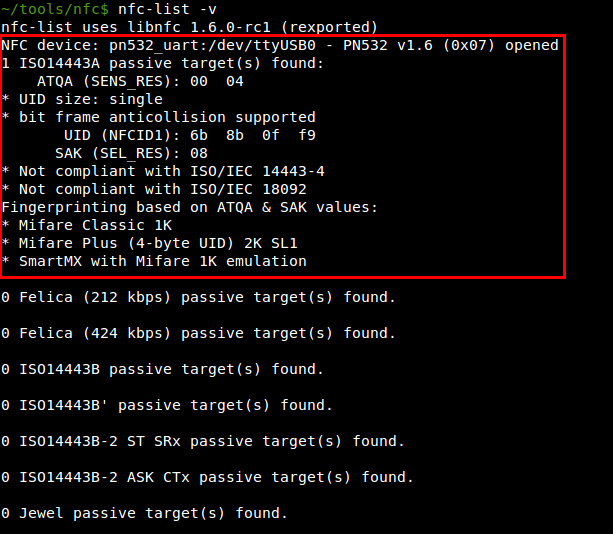
If it’s all right, putting a RFID card or a NFC tag close to the reader and using the nfc-list command we should see something like this:
Our lab is almost ready. The only missing thing is that we need something to read with our toy. We could choose one of the different RFID cards we use daily at gyms, buses, work, etc., but I think it would be better using a real NFC payment card or similar. If we don’t have any of this we can
buy some NFC Forum tags to make some tests with our reader or our smartphone. In following blog posts I will show what we can do now we have the lab ready, stay tune! 😉